phpMyAdmin 是一個以 PHP 為基礎開發,Web-Base 方式架構在伺服器上圖形化的 MySQL/MariaDB 的資料庫管理工具。
安裝完 phpMyAdmin 登入時,若在首頁下方出現如下圖的提示警告訊息 The phpMyAdmin configuration storage is not completely configured, some extended features have been deactivated.

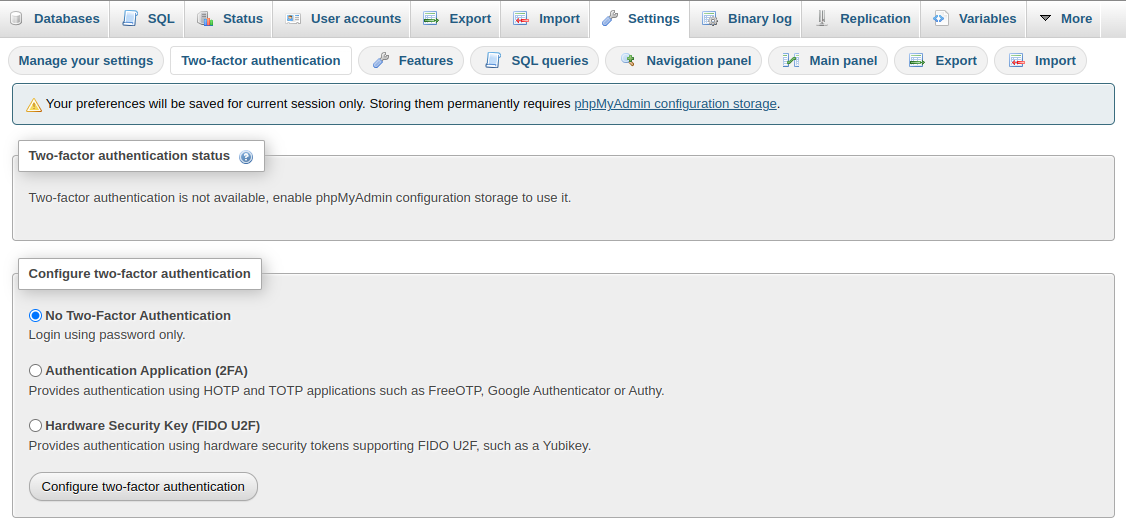
表示缺少「phpmyadmin」資料庫可以用來儲存 phpMyAdmin 的一些額外設定,而啓用兩階段的功能也會需要這個 phpMyAdmin Configuration Storage 來儲存個人的 2FA 設定內容。

建立 phpMyAdmin Configuration Storage
若要開啓 phpMyAdmin Configuration Storage 有兩個已知的方式:
- 匯入 phpMyAdmin 中的
create_tables.sql建立phpmyadmin資料庫 - 在頁面檢測的結果選擇 Create 的連結
匯入 create_tables 建立資料庫
我們可以在 phpMyAdmin 中的 sql 資料夾(phpmyadmin/sql/)下,找到名稱為 create_tables.sql 的 SQL 檔,這個 SQL 檔能夠用來建立儲存進階功能設定的 phpmyadmin 資料庫。

可以在 command line 用 mysql cli 工具匯入,指令如下:
| |
也可使用 phpMyAdmin 提供的圖形化界面的匯入功能,將 create_tables.sql 檔案匯入。成功的匯入後就能看到增加了一個 papmyadmin 資料庫,其中有許多以 pma__ 開頭的資料表。
頁面檢測的結果的 Create 連結
首頁下方警告訊息 「The phpMyAdmin configuration storage …略… deactivated」 緊接着一個 Find out why 的連結,點擊之後,會轉換到 phpMyAdmin configuration storage 檢查程序頁面,頁面檢查失敗時出現另一個警告訊息 「Create a database named ‘phpmyadmin’ and setup the phpMyAdmin configuration storage there」,最前方的 Create 為一個可以點擊的超連結。這個連結會帶我們到建立 phpmyadmin 資料庫的頁面。

建立 configuration storage 設定
在資料庫中,我們不會讓所有的使用者都擁有可以完全修改 phpmyadmin 資料庫的權限,避免s使用者不小心更動或是刪除別人的資料,所以我們需要新增一個專門給 configuration storage 使用的帳號並賦予權限,專門用來操控這些進階設定儲存用。
建立使用者及密碼
使用具有資料庫管理者權限的帳號登入資料庫,建立給 configuration storage 使用的新使用者帳號及密碼,名稱可以自訂。並給予在 phpmyadmin 資料庫中有 SELECT、INSERT、 UPDATE、DELETE 四個權限。
| |
修改 config.inc.php 設定檔
開啟 config.inc.php 設定檔,在對應的 $cfg['Servers'][$i] 加入如下的設定內容,controluser 為前一個步驟設定的帳號名稱,controlpass 為前一個步驟設定的密碼。
| |
開啓兩階段認證
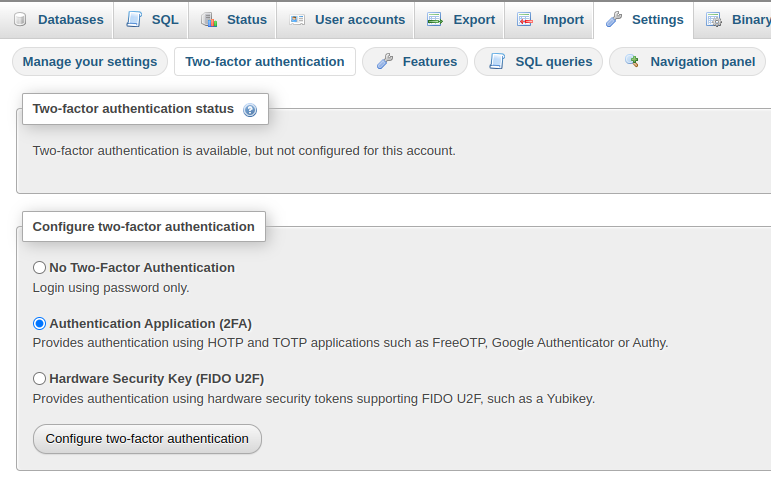
再回到 phpMyAdmin 的頁面,Setting -> Two-factor authentication,在 Configure Two-factor authentication 區塊中選擇 Authentication Application (2FA),再按下 Configure two-factor authentication 按鈕。

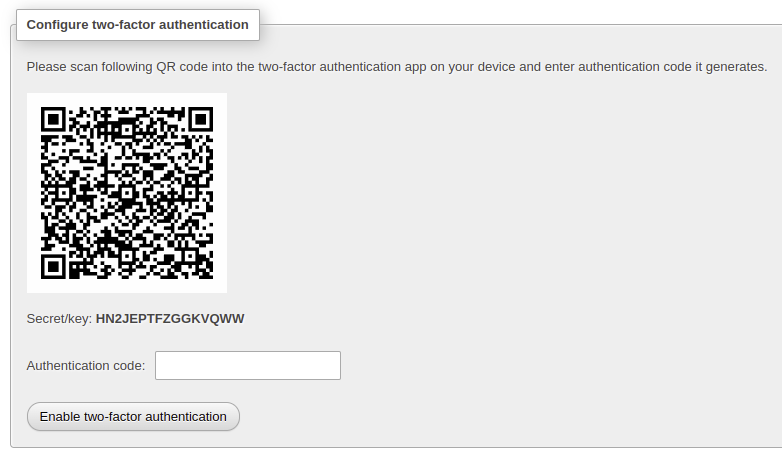
接著會出現一個 QRCode 的畫面,打開行動設備中的 Google Authenticator 軟體(或是 Authy)軟體,掃描頁面上的 QRCode,再將出現的 OTP(One-Time Password) 填入 QRCode 下方的輸入格, 最後按下 Enable two-factor authentication 就完成整個步驟。

關閉兩階段驗證
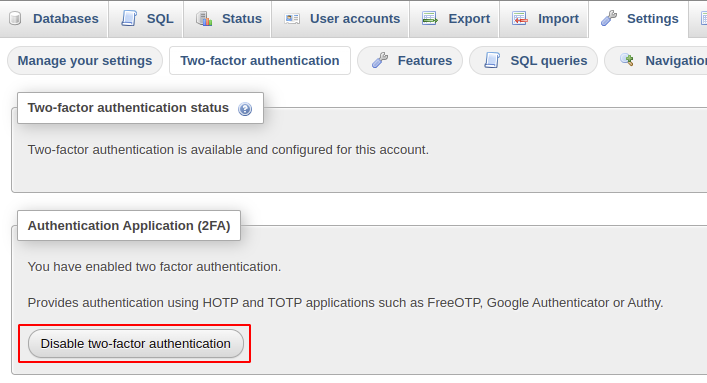
如果要關閉兩階段驗證,同樣回到 Setting -> Two-factor authentication,按下 Disable two-factor authentication 即可。
參考資料:
